
Twilight Real Estate Photography Camera Settings for Flawless Exterior Shots
The Problem With Shooting Twilight Exteriors
You show up to a listing at 7:45 PM in October. The sky is shifting fast—deep blue overhead, orange glow bleeding off the horizon, porch lights warming up, and the garage flood lamp doing something ugly to the driveway. You have maybe 18 usable minutes before the sky goes black and the house becomes a silhouette. Every shot you miss is a shot the agent notices is missing.
Twilight exterior photography is the highest-stakes assignment in residential real estate work. The reward is undeniable—a properly balanced dusk exterior commands attention in a listing feed. But the technical window is narrow, the variables are competing, and there is no post-production trick that fully recovers a blown sky or a muddy façade. You need your camera settings dialed before you arrive.
This guide covers the specific aperture, ISO, and shutter speed combinations that work for twilight listing exteriors, plus a tethered shooting approach that gets you consistent, deliverable files inside that tight window.
Understanding the Twilight Exposure Equation
Twilight exterior photography is a balancing act between three competing light sources: the ambient sky, the artificial interior light spilling through windows, and the exterior accent lighting on the house itself. Your camera settings need to honor all three without blowing the sky or blocking up the shadows on the façade.
Start With Aperture: f/8 Is Your Foundation
For most residential exteriors, f/8 is the working aperture. Here is why:
- It keeps the full façade sharp from the nearest landscaping to the roofline without requiring extreme focus stacking.
- It avoids the diffraction softness that creeps in past f/11 on most full-frame sensors.
- It gives you a predictable depth of field across varied lot depths.
If the property has a shallow lot and you are shooting from close range, you can open to f/7.1 without sacrificing sharpness. Do not go wider than f/6.3 for twilight exteriors—you start losing sharpness on windows and architectural detail at the edges of the frame.
For luxury properties with long driveways where you need maximum depth, f/9 to f/10 is acceptable, but expect to compensate with ISO rather than shutter speed.
ISO: The Practical Range for Twilight
Modern full-frame cameras (Sony a7 series, Nikon Z6/Z7, Canon R5/R6) handle twilight exteriors cleanly between ISO 400 and ISO 800. That is your target range. Here is the reasoning:
- ISO 400 gives you clean shadow detail on the façade without needing shutter speeds so long that any slight wind movement in trees or flags registers as blur.
- ISO 800 is still acceptable on modern sensors. Noise is present but manageable in Lightroom with Denoise AI or equivalent tools.
- ISO 1600 is a rescue setting only—use it if the sky is closing faster than expected and you need to maintain a shutter speed short enough to avoid motion blur in landscaping.
APS-C shooters should target ISO 200 to ISO 400 to get equivalent image quality.
Shutter Speed: Balancing Ambient Sky and Artificial Light
This is where twilight real estate photography camera settings get property-specific. Your shutter speed controls the sky exposure more than anything else.
The working range is typically 1/15s to 2 seconds, depending on how far into the blue hour you are shooting.
- Early blue hour (15–20 min after sunset): Start at 1/30s to 1/15s at ISO 400, f/8. The sky is still bright enough that longer exposures will blow it out.
- Peak blue hour (20–30 min after sunset): Move to 1/8s to 1/4s. This is the sweet spot—sky is a deep, saturated blue, interior lights are registering warmly, and exterior accent lights are punching without washing the façade.
- Late blue hour (30–40 min after sunset): You are at 1/2s to 2 seconds now. Tripod must be locked solid. Any breeze in the landscaping will register. Check for motion blur on every frame.
Always use a remote shutter release or 2-second self-timer. Mirror lockup if you are on a DSLR. Camera shake at these shutter speeds will ruin sharpness in ways that are not always obvious until you open the file at 100%.
Tethered Shooting for Twilight Exteriors
Shooting tethered during twilight is not just a nice-to-have—it is a workflow decision that directly affects your delivery consistency.
Why Tether at Twilight
Your camera's rear LCD is unreliable in low-light conditions because the screen auto-adjusts brightness based on ambient light around you. What looks exposed correctly on the camera back often arrives on your laptop as underexposed by half a stop. Tethering to Lightroom or Capture One on a laptop gives you an accurate, calibrated preview.
The Tethered Twilight Workflow
- Arrive 30 minutes before sunset. Set up your tripod and frame your primary angle while there is still enough light to compose accurately. Lock your tripod head.
- Connect via USB-C (or USB 3.0 for older systems) and open a tethered session in Lightroom. Create a naming template that includes the property address and shot number.
- Shoot a test frame at ISO 400, f/8, 1/30s and evaluate on your laptop. Adjust shutter speed only—keep aperture and ISO fixed so your variable set stays manageable.
- Apply a base develop preset to incoming shots automatically so every frame arrives with your standard white balance correction, lens profile, and a conservative highlight recovery. This lets you evaluate actual exposure rather than raw files.
- Shoot in brackets of 3 (one stop under, target, one stop over) every five minutes as the sky transitions. You will blend or select in post, but having the bracket gives you insurance against the sky moving faster than expected.
- Check the histogram on every fifth frame. You want the sky's blue channel sitting around 75–80% of full scale—not clipping, not blocked.
The Day-to-Dusk Option When the Shoot Window Closes
Sometimes you cannot be on-site during blue hour. The closing is tomorrow, the weather was uncooperative all week, or the listing went live before twilight photography was even discussed. That is a real scenario for working photographers, not a failure.
A Day to dusk exterior edit takes a clean daytime photograph and renders it with a realistic twilight sky, warm window glow, and evening ambiance—without requiring a return trip.
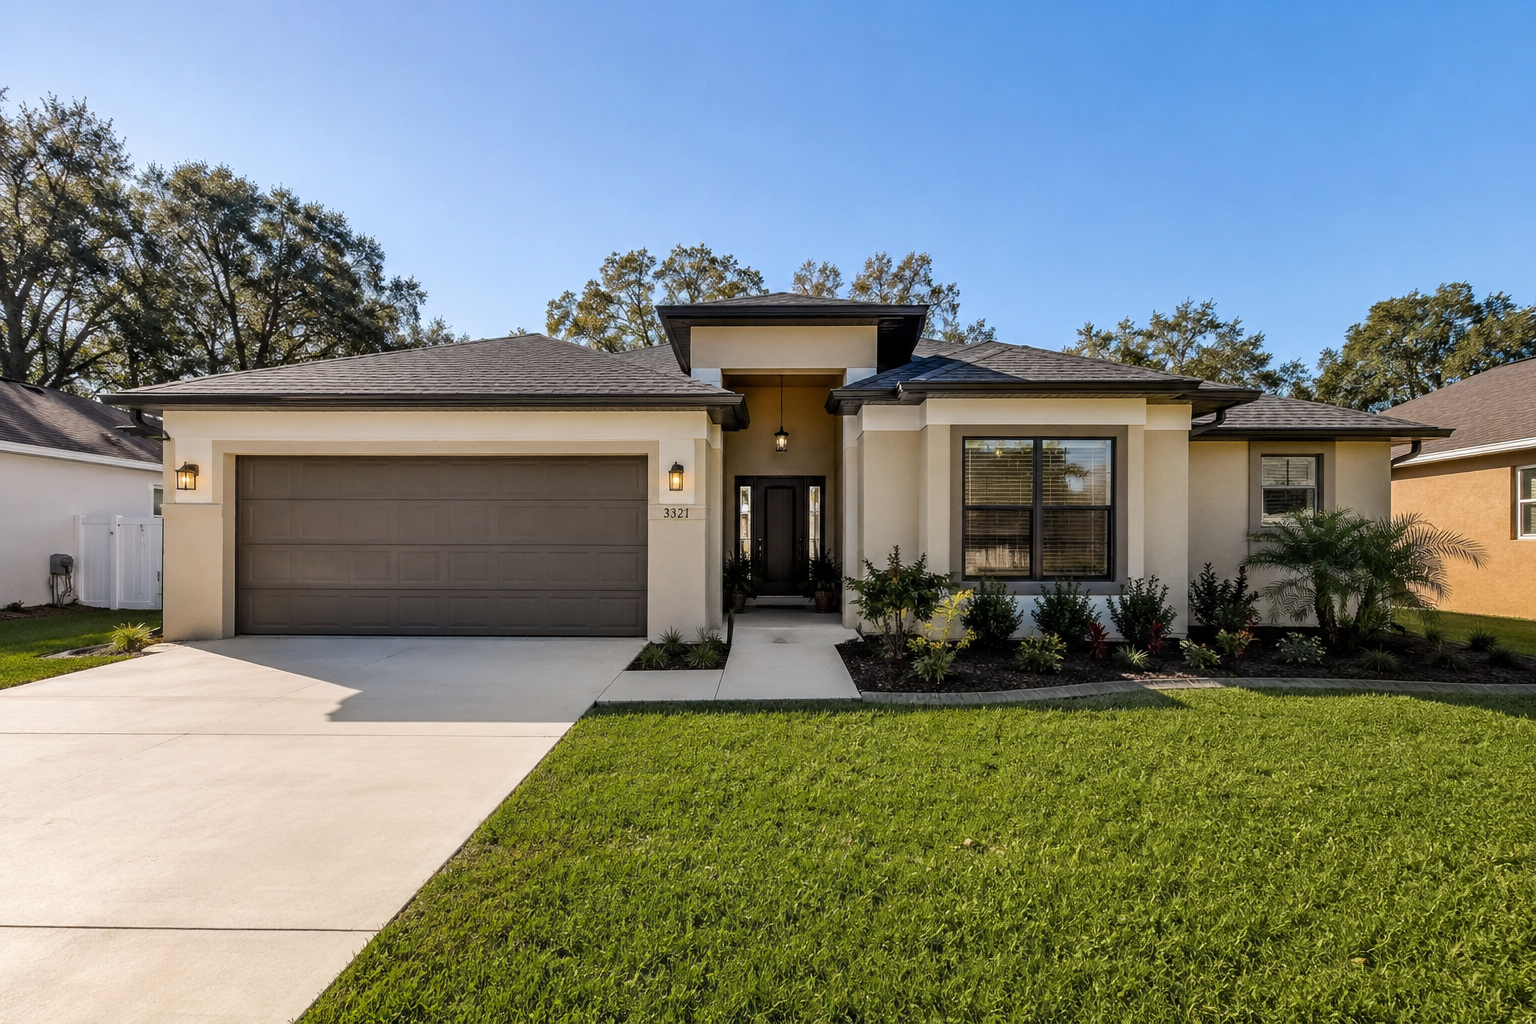 Before: Exterior daytime
 Day to dusk: Exterior treated for twilight presentation
The comparison above shows what a properly executed day-to-dusk treatment delivers. The sky reads as genuine blue hour, the window light registers as occupied and warm, and the overall property presence is dramatically stronger than the flat daytime version. This is disclosed as Day to dusk in the delivery—accurate, professional, and expected in the market.
Workflow: Labeling and Delivery
Once you have your twilight files (shot on-site or processed as day-to-dusk), your delivery workflow should follow a consistent structure:
- Assign a room type on every photo before generate. If you are running these through an AI editing platform, label exterior shots as exterior so the processing engine applies the right sky, lighting logic, and enhancement profile. Mislabeled files get interior treatment applied to exterior shots—it wastes time and produces incorrect results.
- Review a stills gate before anything else continues. All still images should be approved before any video clips or tour assets are rendered. This prevents compounding errors downstream.
- Deliver in a labeled ZIP: stills folder, clips folder (if applicable), virtual tour file, and a disclaimer document that clearly marks any day-to-dusk or virtually staged images as edited representations.
This is not just best practice—it is liability protection for you and the agent.
Closing: Consistency Is the Deliverable
Twilight real estate photography lives and dies on preparation. The camera settings covered here—f/8, ISO 400–800, shutter speed adjusted to the sky—are not guesses. They are the parameters that working listing photographers return to on every blue hour shoot because they produce consistent, reviewable results inside a window that does not wait.
If you are building a system around twilight and exterior work that scales across multiple listings, Itsbundle is built for exactly that workflow. Upload your exterior stills, select Dusk this, and get a day-to-dusk result that is ready to drop into your delivery package. Start a listing or explore how the exterior workflow runs in practice.
The goal is the same whether you are on-site at 8 PM or processing a daytime file: a façade that earns its place at the top of the listing gallery.