
Golden Hour to Blue Hour: Dusk Exterior Real Estate Photography Tips That Sell Listings Faster
The Problem Every Listing Photographer Faces at Dusk
You arrive on site forty-five minutes before sunset with a plan. The homeowner has turned on every interior light. The agent wants that "warm glow" shot. You've got a clear sky, a clean driveway, and a property that photographs well—but you also have maybe fifteen usable minutes before the sky goes flat black and your exposures stop cooperating.
Dusk exterior real estate photography tips are everywhere online, but most of them are written for enthusiasts, not working listing photographers who need repeatable, fast results on consecutive shoots. This guide is for you: the shooter who bills by the listing, not the hour, and who needs the blue-hour window to work every single time.
Why the Blue Hour Beats Golden Hour for Exteriors
Golden hour gets all the press, but for listing exteriors, blue hour is the better tool. Here's the practical reason: during golden hour, the sun is still low enough to cast harsh shadows across the façade and blow out west-facing windows. The sky is bright relative to the interior lights, so your interior glow—which agents love—gets washed out.
Blue hour, that 10-to-15-minute window after the sun drops below the horizon, gives you a naturally balanced ambient. The sky holds a deep, saturated blue. Interior lights register clearly without overexposure. Landscape lighting, porch sconces, and garage lights all render with detail rather than blowing to white.
The catch: that window is genuinely 10 to 15 minutes. On overcast evenings, even less. You cannot waste time fiddling with settings on site.
Know Your Window Before You Arrive
Pull your blue-hour start time before you leave for the shoot. Apps like PhotoPills or even a simple sunrise-sunset calculator will give you civil twilight end time—that's your blue-hour floor. Your target exposure window opens roughly 8 minutes after sunset and closes 18 to 22 minutes after sunset depending on latitude and season. Mark both times in your phone calendar for the shoot date and set a two-minute warning alarm for your bracket sequence start.
Bracketing for HDR Blending: The Practical Setup
Hand-holding at blue hour is not a workflow—it's a gamble. Tripod, cable release or two-second self-timer, mirror lock-up if you're shooting DSLR. Non-negotiable.
For HDR bracketing at dusk exteriors, a three-shot bracket at ±2 EV is the standard starting point. In practice, many experienced listing photographers run a five-shot bracket (−4, −2, 0, +2, +4) when the interior-to-exterior luminance difference is extreme. The extra stops protect you in post and give your blending software cleaner masks on window areas.
Recommended bracket sequence for dusk exteriors:
- −2 EV: Exposes for sky detail and prevents clipping on bright porch or garage lights
- 0 EV: Metered exposure, usually your base blend layer
- +2 EV: Opens shadow detail on dark landscaping, shaded soffits, and stone or brick surfaces
Shoot in RAW across all brackets. If your camera supports it, enable automatic exposure bracketing (AEB) and fire the sequence in one shutter hold to minimize tripod micro-movement between frames.
Balancing Interior Light Bleed Against Exterior Ambient
This is the real craft problem at dusk, and it's where most mediocre dusk shots fail. Interior light bleed happens when the lights inside the home are significantly brighter than your exterior exposure requires, causing windows to render as featureless white or orange rectangles.
On-Site Strategies to Control Bleed
-
Angle of incidence matters. Position your tripod at a 30-to-45-degree angle to the main façade rather than shooting straight-on. Oblique angles reduce the apparent window surface area and make bleed easier to mask in post.
-
Ask the homeowner to dim. Recessed LED fixtures at 60–70% brightness blend far better than 100%. Living room lamps at full power pointed toward windows are your enemy. Ask the agent to make this call before you arrive—it saves negotiation time on site.
-
Shoot the interior separately. If you're already completing an interior shoot at the same property, grab your interior window pulls while you're inside. A properly exposed interior-facing window shot gives you the material to composite clean window views into your dusk exterior in post without losing the warm-light narrative.
-
Flag your exposures immediately. On your memory card or in Lightroom, mark your bracket sequences by property zone before you move your tripod. Disorganization at the import stage costs more time than the bracket sequence itself.
The Day-to-Dusk Pair: Showing the Before and After
One of the most compelling ways to present dusk work to agents—and to market your own services—is the day-to-dusk pair. The daytime shot establishes the property clearly; the dusk shot closes the emotional sale.
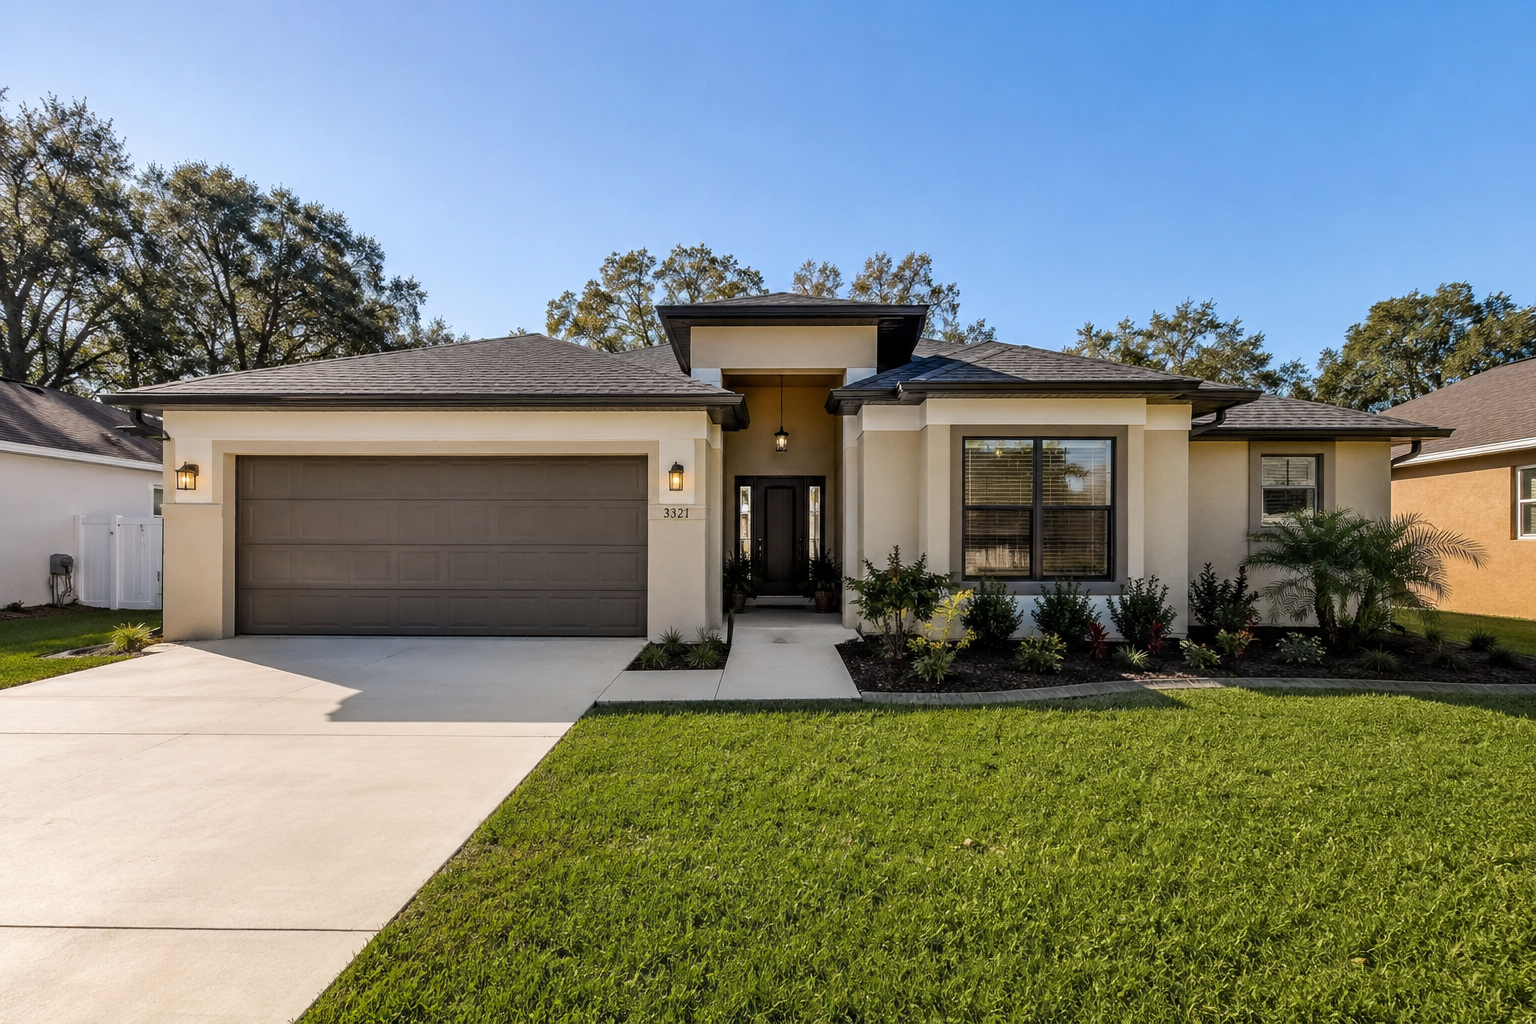 Before: Exterior daytime — clean reference shot, flat ambient light
 Day to dusk — same façade, blue-hour ambient, interior warmth legible through windows
This pairing is labeled Day to dusk in delivery so agents and MLS coordinators understand exactly what they're looking at and can use the images appropriately under disclosure guidelines.
Workflow on Site: Don't Leave Decisions for the Desk
The photographers who consistently deliver clean dusk work aren't necessarily better at post-processing—they're better organized on site. Every photo gets an assignment before you pack up the car.
Here's the beat that matters: assign a room type on every photo before you generate or submit anything for processing. For dusk exteriors, that means flagging your bracket sequences explicitly as exterior dusk rather than lumping them in with your general exterior selects. When you later submit to a processing workflow, that label tells the system—or your retoucher—to treat it as a dusk blend, not a standard HDR.
The same logic applies if you're using an AI-assisted delivery platform. Labeling drives accuracy. A mislabeled bracket sequence submitted as a standard exterior will come back treated like midday HDR, and you'll spend revision time you don't have.
After processing, run a stills review gate before any clips or tour assets continue. Confirm your exterior dusk selects are clean—sky color is consistent across angles, window bleed is controlled, and the façade reads without flat black zones in the landscaping—before you approve motion delivery or 360 tour generation off the same shoot.
Delivery: Label Everything, Disclose Accurately
Your delivery ZIP should separate stills, clips, and tour assets into clearly labeled folders. For dusk work specifically, any exterior shot that has been composited, blended from brackets, or processed from a daytime capture should carry accurate disclosure. If you're delivering a day-to-dusk conversion rather than a shot-at-dusk original, that distinction matters to your clients and to MLS compliance.
Disclose in the filename convention. Something as simple as address_ext_dusk_daytodusk_01.jpg in the stills folder removes ambiguity and protects you downstream.
The Outcome Agents Actually Notice
A well-executed blue-hour exterior is not a gimmick—it's a conversion tool. Properties that lead their MLS gallery with a clean dusk exterior consistently generate more save-and-share activity than the same property photographed at midday. The warm interior glow signals occupancy and livability in a way that flat noon light simply cannot.
If you want to streamline the turnaround on dusk exteriors—especially day-to-dusk processing for shoots where you can't control the schedule—it's worth exploring how Itsbundle handles that workflow. You can start a listing, flag your exterior frames for dusk treatment, review your stills before anything else moves forward, and receive a labeled delivery ZIP with everything your agent needs. No chasing vendors, no separate retouching queue.
Blue hour is brief. Your workflow shouldn't be the thing that wastes it.